- 欢迎来到Minecraft插件百科!
- 对百科编辑一脸懵逼?帮助:快速入门带您快速熟悉百科编辑!
- 因近日遭受攻击,百科现已限制编辑,有意编辑请加入插件百科企鹅群:223812289
TerrainControl
| 外文名 | TerrainControl |
| 插件类型 | Spigot / CraftBukkit |
| 最新版本 | v2.7.2 |
| 兼容服务端 | 1.7.2-1.8.3 |
| 前置插件 | 无 |
| 源地址 | http://dev.bukkit.org/bukkit-plugins/TerrainControl |
- 点击此处开始翻译。
- 如本模板出现在原文存档页面,请注意更新主页面后,仍需要去除此处该模板。
- 如当前页面已经没有需要翻译的内容,请删去待翻译模板。
- 有标题的大篇幅文章,如果短时间内无法全部翻译,请先把所有的标题翻译出来,以便之后的贡献者选择与翻译章节内容。
概述
Terrain Control is an advanced world generator. Through various configuration files it gives the user control over almost every aspect of Minecraft terrain generation, with no knowledge of Java required. It can be used on Bukkit or Forge servers and on singleplayer with Forge. Terrain Control is the successor to the old PhoenixTerrainMod, which was based on the popular BiomeTerrainMod. Terrain Control is maintained by Khoorn (known as Wickth on GitHub).
Control horizontal and vertical noise of terrain generation Control terrain height and volatility per biome Generating biome maps from images Control the size of biomes, islands and continents Custom biomes Many options for caves, canyons Control vanilla structures like mineshafts, strongholds and villages Full control of ores, plants, dungeons, ponds and many more Custom trees and other objects (BO2 and BO3) Block replacement Visual settings like custom foliage colors (TerrainControl client required) To learn more, check out all of Terrain Control's features!
Tutorials
Beginner
Installation guide
Time: 5 Jun 2014 Terrain Control currently supports CraftBukkit, Spigot, Cauldron and Forge (even singleplayer). One universal jar file is used that works on all platforms.
- Forge (singleplayer)
First, download and install Forge. Run Minecraft once to make sure that everything works. Then download the file linked on the homepage of the wiki. Make sure that the Minecraft version for the download matches your Minecraft version. Put the file in the mods folder inside the .minecraft folder.
You can now create a new world with the world type Terrain Control. The mod only affects worlds created with this world type. If you don't edit the settings found in .minecraft/mods/TerrainControl/worlds/YOUR_WORLD_NAME/, the world will look like a default Minecraft world. Each time you change the settings, you must delete the .minecraft/saves/YOUR_WORLD_NAME/region folder to generate the world again. Changed settings won't magically affect already generated chunks! This tutorial will teach you the first steps of customizing your world.
- CraftBukkit, Spigot and Cauldron servers
Simply put the jar file in the plugins folder to install, just like every other Bukkit plugin. The plugin doesn't require your players to have the singleplayer version installed, but they will get some more features if they have installed it.
After you have installed it, you must still activate it for your world. If you don't have a multiworld management plugin like Multiverse, add the following to your bukkit.yml to enable Terrain Control for that world (use spaces, not tabs!):
worlds:
 your_world_name:
   generator: TerrainControl
If you are using Multiverse, you can create a new Terrain Control world using:
/mv create your_world_name normal -g TerrainControl
If you're instructing your multiworld plugin to use Terrain Control for one of the default worlds, also add Terrain Control to the bukkit.yml as described above. Terrain Control needs this to be properly initialised for default worlds. If you are using another multiworld management plugin, look up the documentation for that plugin. Use TerrainControl (without a space between Terrain and Control) as the generator name. The name is case sensitive.
If you don't change the settings found in plugins/TerrainControl/worlds/YOUR_WORLD_NAME/, the world will look like a default Minecraft world. Each time you change the settings, you must delete the YOUR_WORLD_NAME/region folder to generate the world again. Changed settings won't magically affect already generated chunks! This tutorial will teach you the first steps of customizing your world.
- Forge servers
Make sure that Forge is installed on the server. Put Terrain Control in the mods folder. Go to the server.properties file and set level-type to TerrainControl (without a space between Terrain and Control). Delete the level.dat of your main world to get one with the correct level type.
If you don't change the settings, the world will look like a default Minecraft world. Each time you change the settings found in mods/TerrainControl/worlds/YOUR_WORLD_NAME/, you must delete the YOUR_WORLD_NAME/region folder to generate the world again. Changed settings won't magically affect already generated chunks! This tutorial will teach you the first steps of customizing your world.
Beginners tutorial
Welcome, new user!
After you have succesfully installed Terrain Control, you can start creating your own worlds. Create a world on creative with TerrainControl as the generator and 12 as the seed. We re using this seed so that your world will be identical to the tutorial world. If you don't need any help creating a Terrain Control world with a specified seed, just skip this list.
- If you are on singleplayer, click Create New World, select Creative as the game mode and fill in a name for your world. Click on More World Options, and fill in 12 as the seed and choose TerrainControl as the world type. Make sure that Allow Cheats is on, you will need it for the /tp command.
- If you are on Bukkit and have Multiverse you can use /mv create world_name NORMAL -s 12 -g TerrainControl to create the world and /mv tp world_name to teleport to it.
- If you are on Bukkit and have another multiworld-management plugin, look up the documentation of that plugin on how to create a new world. Use 12 as the seed and TerrainControl as the generator name.
- If you are on Bukkit and you don't have a multiworld-management plugin, go to your bukkit.yml file and add the following:
worlds:
 your_world_name:
   generator: TerrainControl
Replace your_world_name with the name of your world, which is usually just world. Also, don't use tabs in this file, use spaces! Go to the server.properties file and set the level-seed setting to 12. Delete the whole world folder to get a fresh level.dat with the correct seed.
- If you are on a Forge server, go to the server.properties and set the level-type setting to TerrainControl and the level-seed setting to 12. Delete the whole world folder to get a fresh level.dat with the correct generator and seed.
Now log in once on your world to let Terrain Control generate it's configuration files. Run the command /seed to verify that the seed is indeed 12. You will notice that the world looks just like a default Minecraft world: you haven't yet changed the settings! Close down the game/the server again.
Locate your Terrain Control settings folder. See the installation instructions to find out how. You should see something like this:
Let's open the WorldConfig.ini. Using Notepad is fine. However, don't use an editor which uses text styles, so don't use Word.
All lines starting with a # are comments. They give a brief description of each variable. On the WorldConfig page on the wiki, you can usually find a more detailed description.
To verify that everything works, we are going to change a variable. GenerationDepth is a nice one to change. If you set it to 9, all biomes get halved in size, in both the x and z directions. If you set it to 11, all biomes get doubled in size, again in both the x and z directions. If you set it to 12 the biomes are as large as in the Large Biomes world type. Let's try that. Change the number to 12 and save the file.
If you would (re)start the game/the server now, you still won't see any changes. You have to explore new areas to see the new terrain, just like for any other generator update in Minecraft. Because this is quite annoying, it is a better idea to delete the region folder inside the world folder. This deletes the terrain, but keeps the player positions and the map seed. Never do this while the game/the server is running!
After you have deleted the region folder, start the game/the server and test your changes. You should now see a world with large biomes.
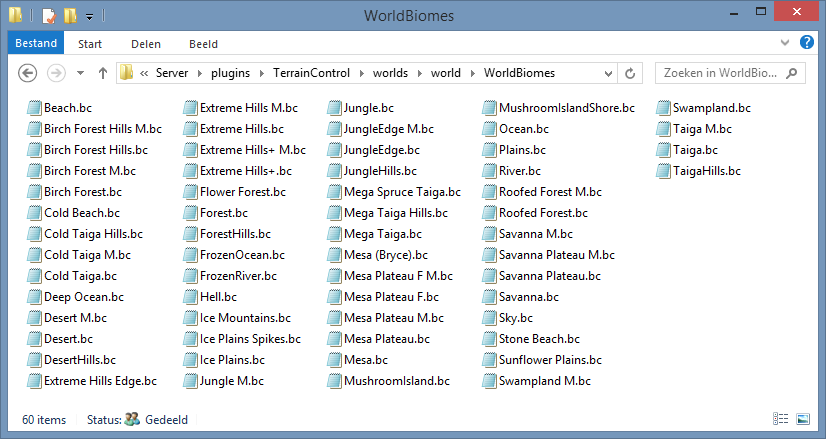
It's now time to explore the WorldBiomes folder. Again, don't forget to close the game/the server. You see a lot of .bc files, whichs stands for BiomeConfig. Some biomes look very obscure (what is Sky.bc?), others are not a biome at all (Since when is a beach a biome? What about river?), and others use strange names (Mesa Plateau F M?). These names were chosen by Mojang.
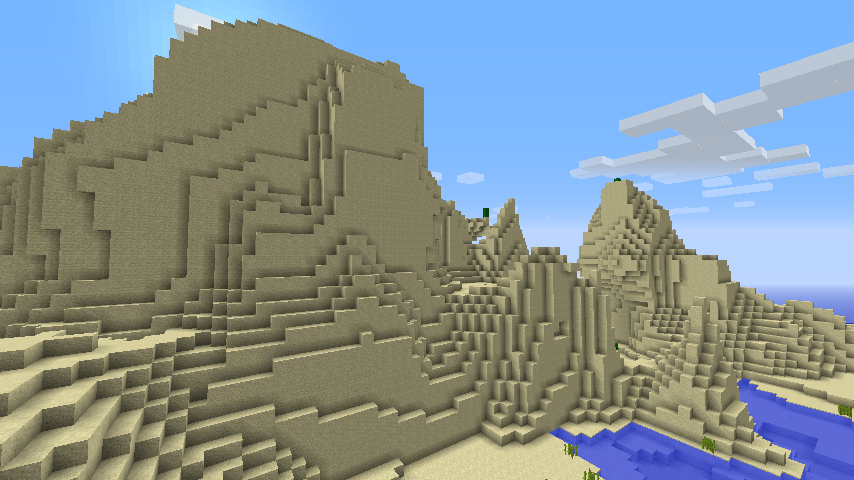
For now you could ignore those strange biomes. Just open up the Desert.bc file. If you scroll down, you will see the BiomeHeight and BiomeVolatility (just below Terrain Generator Variables). Let's add some hills to the desert! Set BiomeHeight to 0.2 (makes the terrain higher, but not more hilly) and BiomeVolatility to 0.4 (makes the terrain more hilly). Now save the result, delete the region folder, and find a desert biome. If you indeed used the seed 12, you can easily teleport to one using the command /tp -19 80 -306.
Maybe the stone in the cliff annoys you, wouldn't sandstone look better? Close the game/the server, open the Desert.bc and set StoneBlock (in the Blocks section) to SANDSTONE. This replaces all stone with sandstone. Stop the game/server, delete the region folder and start the game/server again.
Now you have seen a tiny bit of the power of Terrain Control. It's time for the next step! If you just want to know what each setting does, you can take a look at the other settings in WorldConfig and the BiomeConfigs. If you want to start creating custom biomes, you should read this tutorial, which starts at the point where this tutorial ends. On the home page you could also find a lot of other (external) tutorials. The examples page might also be useful.
Your first custom biome
Common problems
Intermediate
How to create a world from an image
Basic world customization
Basic biomes customization
Advanced
A TerrainControl Analysis
The settings explained
Variable names
WorldConfig
BiomeConfigs
PluginConfig
BO2 Objects
BO3 Objects
Land Fuzzy
Other pages
Examples page
Commands and Permissions
Compatibility with other mods
Compatibility with WorldPainter
External tutorials
- General tutorial by mysource
- Effect of the seed on a map and working with higher (y>128) worlds by mysource
- Achieve certain world styles by mysource
- Create a map by image by mysource
- World merging by mysource
- How Terrain Control's biome generator works by Khoorn
- Cave variables explained by thedeadlytao
- GenerationDepth and LandSize/Rarity Explained by thedeadlytao


