- 欢迎来到Minecraft插件百科!
- 对百科编辑一脸懵逼?帮助:快速入门带您快速熟悉百科编辑!
- 因近日遭受攻击,百科现已限制编辑,有意编辑请加入插件百科企鹅群:223812289
Bukkit/插件开发教程
创建一个新的项目
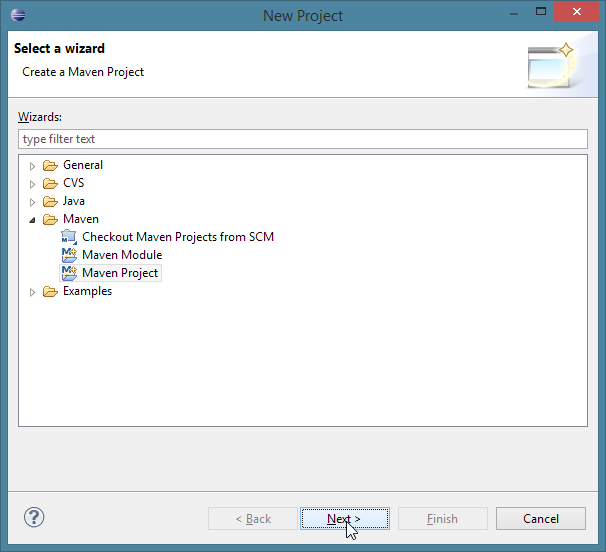
在开始工作之前,你需要先在Eclipse中配置好工作区和文件. 打开Eclipse,然后依次点击File -> New -> Project:来创建一个新的项目.
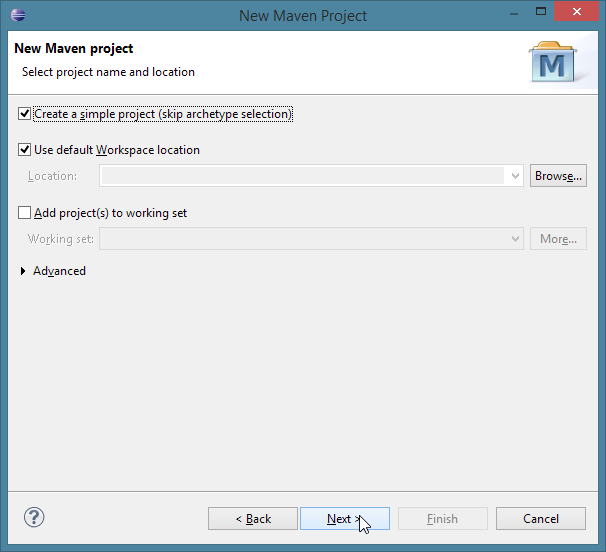
现在,打开Maven文件夹, 然后选择Maven Project.点击next,之后在下一个菜单中选择Create a simple project, 再次点击Next: 如果你看不到Maven文件夹, 那么你需要下载m2eclipse
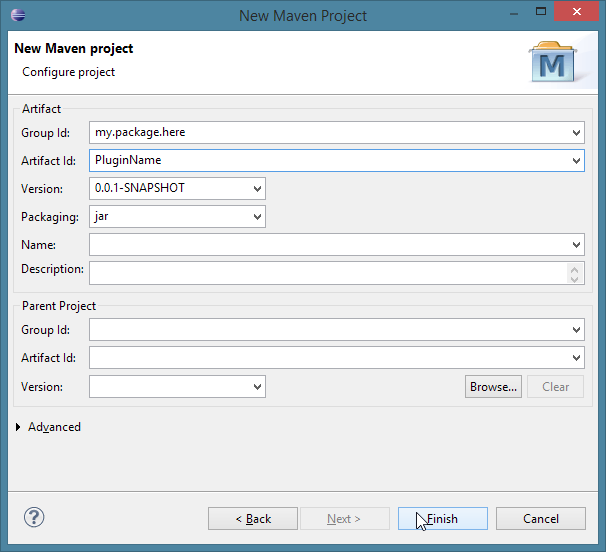
现在,你需要给你的组用户命名,就像下面这样:
- 如果你拥有一个域名,package则填写逆转的域名地址.
- 例如: i-am-a-bukkit-developer.com 你的package地址即是com.i_am_a_bukkit_developer source
- 避免使用一个不属于你自己的域名.
- 没有域名? 这里有几种方法可供选择。
- 在资源管理站点创建一个用户,比如GitHub或是sourceforge
- 对于使用GitHub的用户, 请参照这里的说明 之后你将获得一个子域名,所以你的package地址是io.github.<username>
- 对于使用GitHub的用户, 请参照这里的说明 之后你将获得一个子域名,所以你的package地址是io.github.<username>
- 使用你的邮箱. 例如: <username>@gmail.com格式的邮箱应输入com.gmail.<username>
- 最不济的方法.: 使用独特的组名命名方式,这应当是你最后的解决方法。
- 在资源管理站点创建一个用户,比如GitHub或是sourceforge
以下几个地址不能作为package中的地址前缀:
- org.bukkit
- net.bukkit
- com.bukkit
- net.minecraft
完成基础的组名以后,你需要在最后加上插件的名称. 在这里用 GitHub页面作为讲解的实例. 如果你创建了一个名为 TestPlugin的插件,那么完整的组名是io.github.<username>, 你的工程名也是 TestPlugin. 至于版本,默认即可,稍后可以修改。 完成向导:
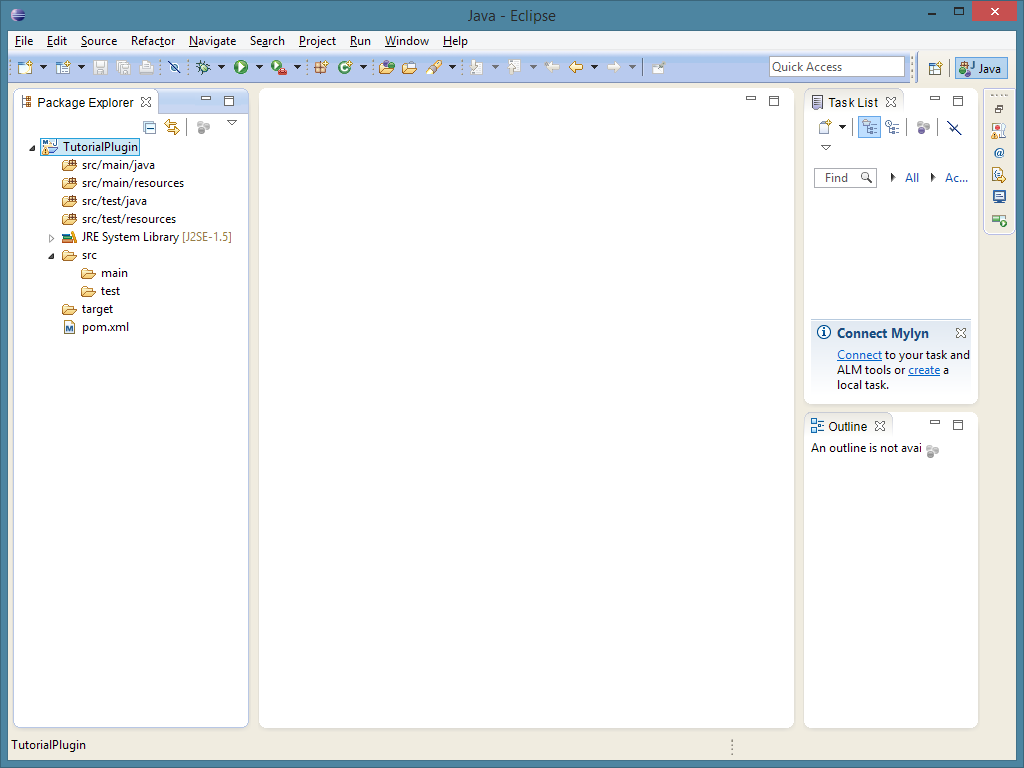
如果这是你首次使用Eclipse, 点击右上角的"X" 来关闭Welcome提示页面. 现在,你的窗口视图看起来就像下面的图片这样:
点击工程名称右边的箭头来进行下一步,现在我们正式开始。
Reference the Bukkit API
Before you begin developing your plugin you will need to add the Bukkit API library to your project as a dependency, you can also add any other API's you may want to use.
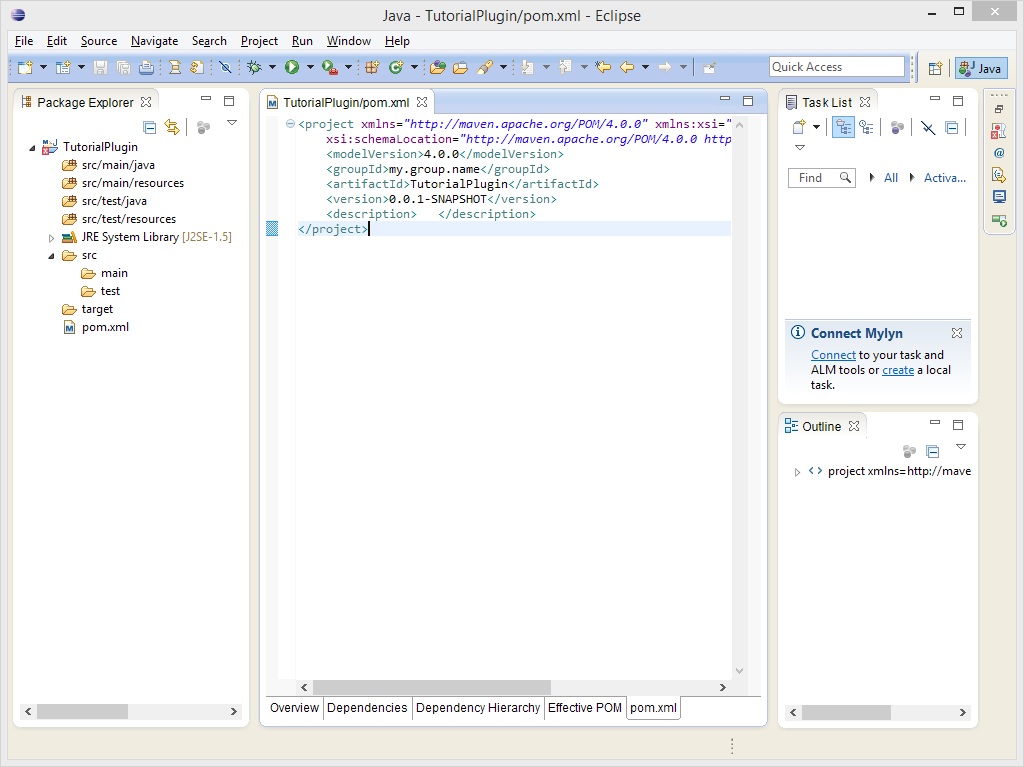
Double-click pom.xml, which is at the bottom of your project's folder. Click the pom.xml tab at the bottom, and you should see something like this:
If you wish to use Java 6+ language features, you must specify the Java version that the project should be built on. Copy and paste this (specifies that the project should be built under Java 7) before </project>:
   <build>
      <plugins>
          <plugin>
              <groupId>org.apache.maven.plugins</groupId>
              <artifactId>maven-compiler-plugin</artifactId>
              <configuration>
                  <source>1.7</source>
                  <target>1.7</target>
              </configuration>
          </plugin>
      </plugins>
   </build>
You may use other levels, such as 1.8 for Java 8. Please note that according to MCStats, the vast majority of server owners run Java 7, so compiling for Java 8 will result in most server owners being unable to run your plugin. If you do use Java 1.7 features, Eclipse will suggest changing the language level when you hover over the code "error". Do so.
Before the </project> at the bottom, copy and paste this block (it tells Eclipse where Bukkit's repository is located):
   <repositories>
       <repository>
           <id>bukkit-repo</id>
           <url>http://repo.bukkit.org/content/groups/public/</url>
       </repository>
   </repositories>
Next, before the </project> at the bottom, copy and paste this block (it tells Eclipse that we're building against Bukkit):
   <dependencies>
       <dependency>
           <groupId>org.bukkit</groupId>
           <artifactId>bukkit</artifactId>
           <version>1.7.2-R0.3</version>
           <type>jar</type>
           <scope>provided</scope>
       </dependency>
   </dependencies>
If you wish to, you may change the version of Bukkit you're building against. You can view the available versions here by looking in the maven-metadata.xml file under versions.
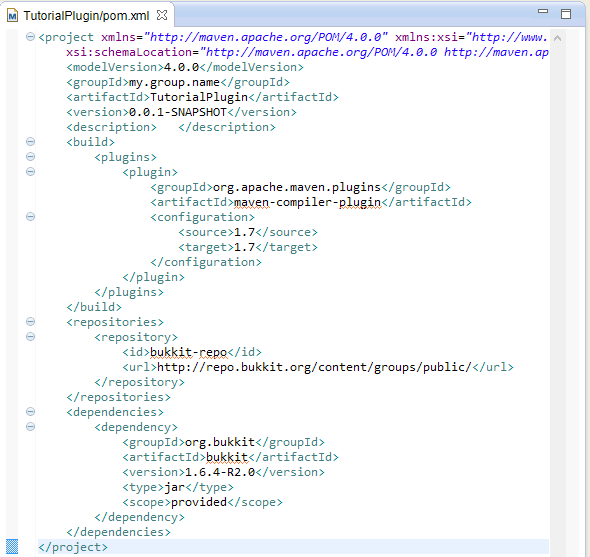
When you finish, your pom.xml should look similar to this:
Save your pom.xml using File -> Save or pressing Ctrl + S. Then, right click the projects title and click Maven -> Update Project.
