- 欢迎来到Minecraft插件百科!
- 对百科编辑一脸懵逼?帮助:快速入门带您快速熟悉百科编辑!
- 因近日遭受攻击,百科现已限制编辑,有意编辑请加入插件百科企鹅群:223812289
“Bukkit/插件开发教程”的版本间的差异
(添加英文原文 部分内容) |
(部分翻译“创建一个新项目”) |
||
| 第1行: | 第1行: | ||
| − | === | + | === 创建一个新的项目 === |
| − | + | 在开始工作之前,你需要先在Eclipse中配置好工作区和文件. 打开Eclipse,然后依次点击''File -> New -> Project:''来创建一个新的项目. | |
[[Image:Newproject.png]] | [[Image:Newproject.png]] | ||
| − | + | 现在,打开''Maven''文件夹, 然后选择''Maven Project''.点击next,之后在下一个菜单中选择''Create a simple project'', 再次点击''Next'': | |
| − | + | 如果你看不到''Maven''文件夹, 那么你需要[http://eclipse.org/m2e/download/ 下载m2eclipse] | |
| − | [http://eclipse.org/m2e/download/ | ||
[[Image:Newproject2.png]] | [[Image:Newproject2.png]] | ||
| − | + | 现在,你需要给你的组用户命名,就像下面这样: | |
| − | * | + | * 如果你拥有一个域名,package would be the domain name in reverse. |
| − | ** | + | ** 例如: i-am-a-bukkit-developer.com your package would be com.i_am_a_bukkit_developer [http://docs.oracle.com/javase/tutorial/java/package/namingpkgs.html source] |
| − | ** | + | ** 避免使用一个不属于你自己的域名. |
| − | * | + | * 没有域名? 这里有些common conventions |
| − | *# | + | *# 在资源管理站点创建一个用户,比如GitHub或是sourceforge |
| − | *#* | + | *#* 对于使用GitHub的用户, 请参照[http://pages.github.com/ 这里的说明] 之后你将获得一个sub-domain, 所以你的package地址将是io.github.<username><br /> |
| − | *# | + | *# 使用你的邮箱. 例如: <username>@gmail.com格式的邮箱应输入为com.gmail.<username><br /> |
*# This is the least preferred method. Simply use any unique group naming, again, use this as your last resort. | *# This is the least preferred method. Simply use any unique group naming, again, use this as your last resort. | ||
2014年10月26日 (日) 21:58的版本
创建一个新的项目
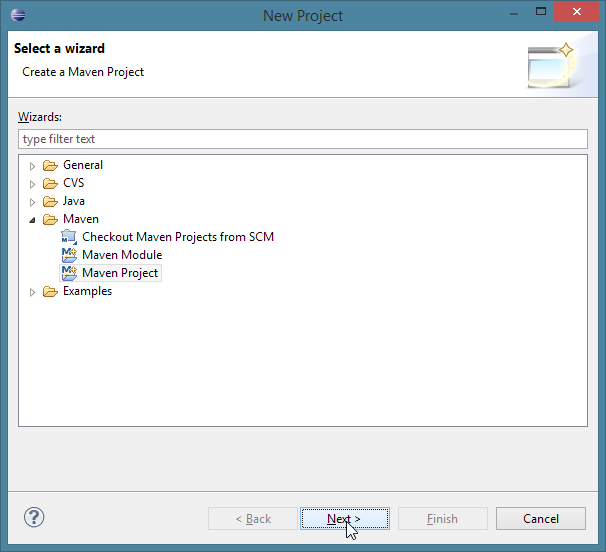
在开始工作之前,你需要先在Eclipse中配置好工作区和文件. 打开Eclipse,然后依次点击File -> New -> Project:来创建一个新的项目.
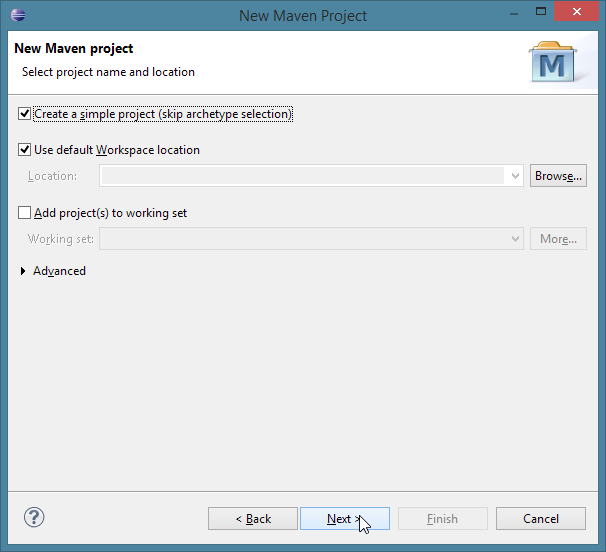
现在,打开Maven文件夹, 然后选择Maven Project.点击next,之后在下一个菜单中选择Create a simple project, 再次点击Next: 如果你看不到Maven文件夹, 那么你需要下载m2eclipse
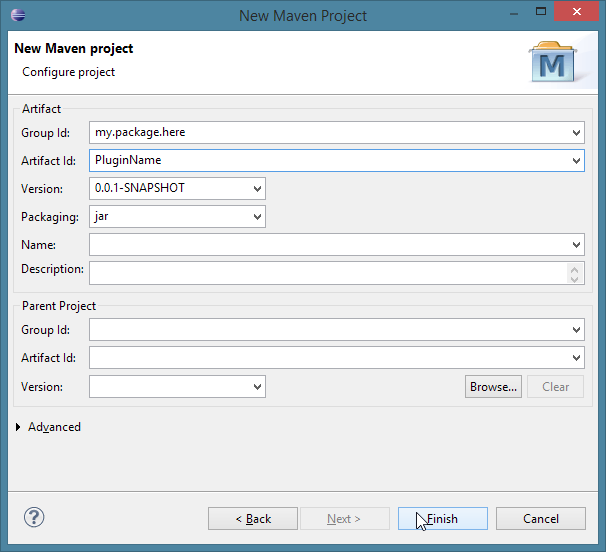
现在,你需要给你的组用户命名,就像下面这样:
- 如果你拥有一个域名,package would be the domain name in reverse.
- 例如: i-am-a-bukkit-developer.com your package would be com.i_am_a_bukkit_developer source
- 避免使用一个不属于你自己的域名.
- 没有域名? 这里有些common conventions
- 在资源管理站点创建一个用户,比如GitHub或是sourceforge
- 对于使用GitHub的用户, 请参照这里的说明 之后你将获得一个sub-domain, 所以你的package地址将是io.github.<username>
- 对于使用GitHub的用户, 请参照这里的说明 之后你将获得一个sub-domain, 所以你的package地址将是io.github.<username>
- 使用你的邮箱. 例如: <username>@gmail.com格式的邮箱应输入为com.gmail.<username>
- This is the least preferred method. Simply use any unique group naming, again, use this as your last resort.
- 在资源管理站点创建一个用户,比如GitHub或是sourceforge
There are several things that your group must not begin with and those are:
- org.bukkit
- net.bukkit
- com.bukkit
- net.minecraft
Once you have the base group name, you will want to finish it off with the plugin name. Lets use the GitHub Pages example for this. If you are creating a plugin called TestPlugin your full group name would be io.github.<username>, and your artifact name would be TestPlugin. For the version, simply stick with the default for now. It can be changed later.
Finish the wizard:
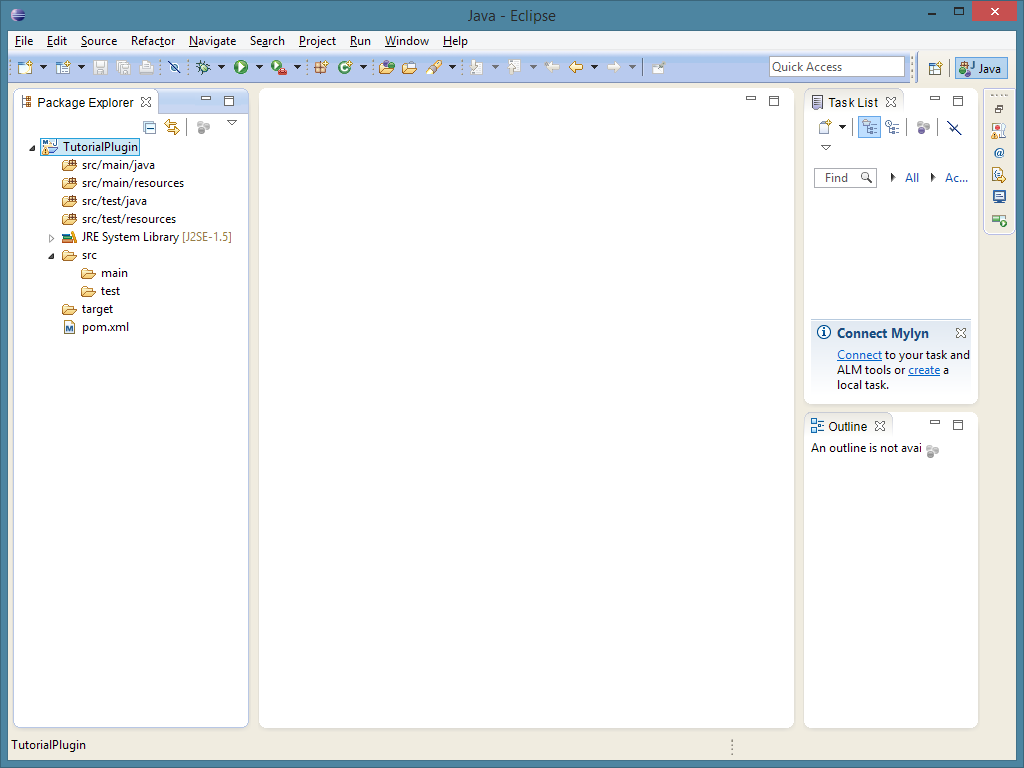
If this is your first time using Eclipse, close the Welcome tab by clicking the "X" next to the Welcome tab on the tab bar. Now, you should have a window that looks like this:
Click the arrow to the left of your artifact name, and let's get started!


